
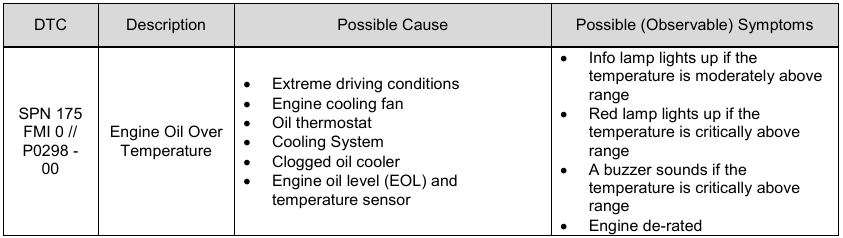
Description
General Information
These repair instructions are intended to address the following faults:
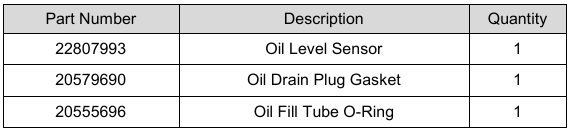
Required Parts
Repair Instructions
Oil Level Sensor Replacement
1. Secure the vehicle for service by parking in on a flat level surface, applying the parking brake, chocking the rear
wheel, and placing the transmission in neutral or park.
2. Turn the main electrical switch off.
3. Disconnect all cables from the negative (ground) battery terminals to prevent personal injury from electrical
shock and prevent damage to electrical components.
4. Open the service hatches at the rear of the bus.
5. Raise the bus and support with jack stands.
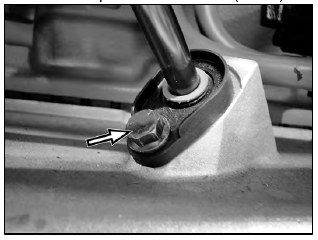
6. Using a suitable container drain the oil. Discard of the oil drain plug gasket.. Dispose of the use oil in
accordance with all state, local and/or federal regulations.
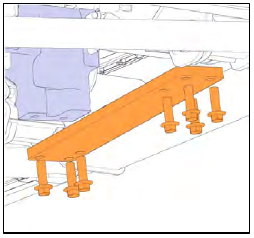
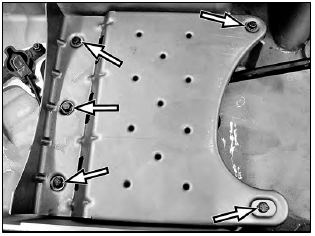
7. Remove the cross member under the oil pan.
8. Remove the hose clamp to the filler pipe. Move the hose aside.

9. Pull out the dipstick about 0.5 m (1.6 ft.). Remove the dipstick and the dipstick outer casing. Plug the holes.
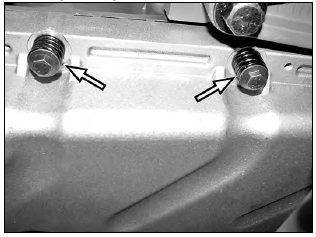
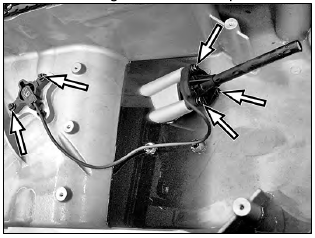
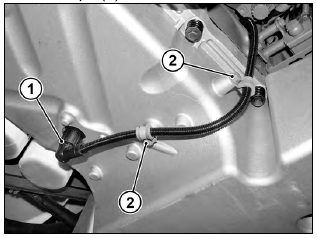
10. Unplug the connector (1) for the oil temperature/level sensor, and remove the cable clamps (2) for the cable.
Move the cable aside.

11. Loosen the bolts for the oil pan. Leave two bolts in place. Note: With the aid of an assistant, or using a jack,
lower the oil pan. Angle the oil pan down at the rear edge and push it forward somewhat. Then lower the oil
pan. Exercise care when removing or installing the oil pan. Move the pan slowly, ensuring the oil strainer
doesn’t get caught on the oil level sensor as this may result in sensor damage.
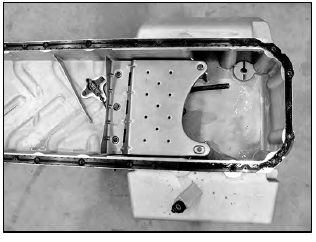
12. Clean the oil pan and remove the gasket.
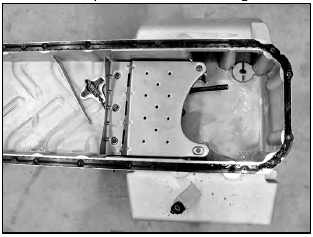
13. Remove the baffle plate.
14. Remove the engine oil level/temperature sensor and electrical connector.
15. Install the new engine oil level/temperature sensor. Install a new, greased O-ring on the electrical connector.
Torque to the proper specification, refer to Group 20, Specification
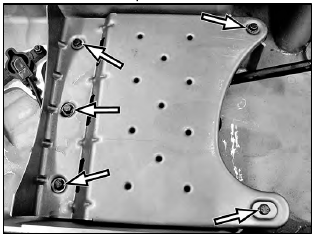
16. Install the baffle plate. Torque to the proper specification, refer to Group 20 Specification.
17. Install a new oil pan gasket. Apply a 3 mm bead of silicone to the cylinder block at the timing gear casing and at the timing gear plate on both sides.
18. Install the oil pan. Note: With the aid of an assistant, or using a jack, lift up the oil pan. Angle the oil pan up at
the front edge and push it forward somewhat. Then lift up the oil pan.Torque the bolts to the proper
specification, refer to Group 20 Specification.
19. Position the cable back and plug in the connector (1) for the engine oil temperature/level sensor, and install the cable clamps (2) for the cable.
20. Install the dipstick tube. Insert the dipstick.
21. Install the hose clamp for the filler pipe.
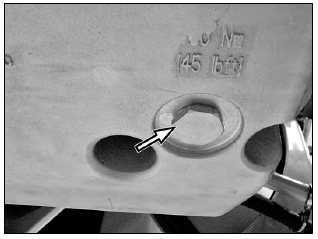
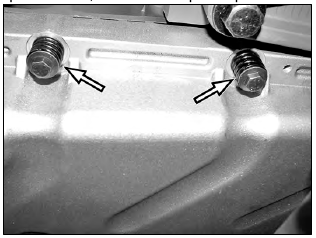
22. Install the drain plug. Torque to the proper specification, refer to Group 20, Specification.
23. Install the cross member beneath the oil pan. Torque to the proper specification, refer to Group 20
Specification.
24. Lower the coach.
25. Fill the engine with oil.
26. Close the service hatches.
27. Install all previous removed cables to the ground (negative) battery terminals.
28. Turn the main electrical switch on.
29. Using Tech Tool, check for codes.
30. Start the engine and carry out function and leakage checks.
Additional Resources
These repairs are the most likely fix for the identified fault(s), if this does not fix the issue, Tech Tool will need to be used for more detailed diagnostics. If filing a warranty claim, please include the ASIST case number.


Reviews
There are no reviews yet.