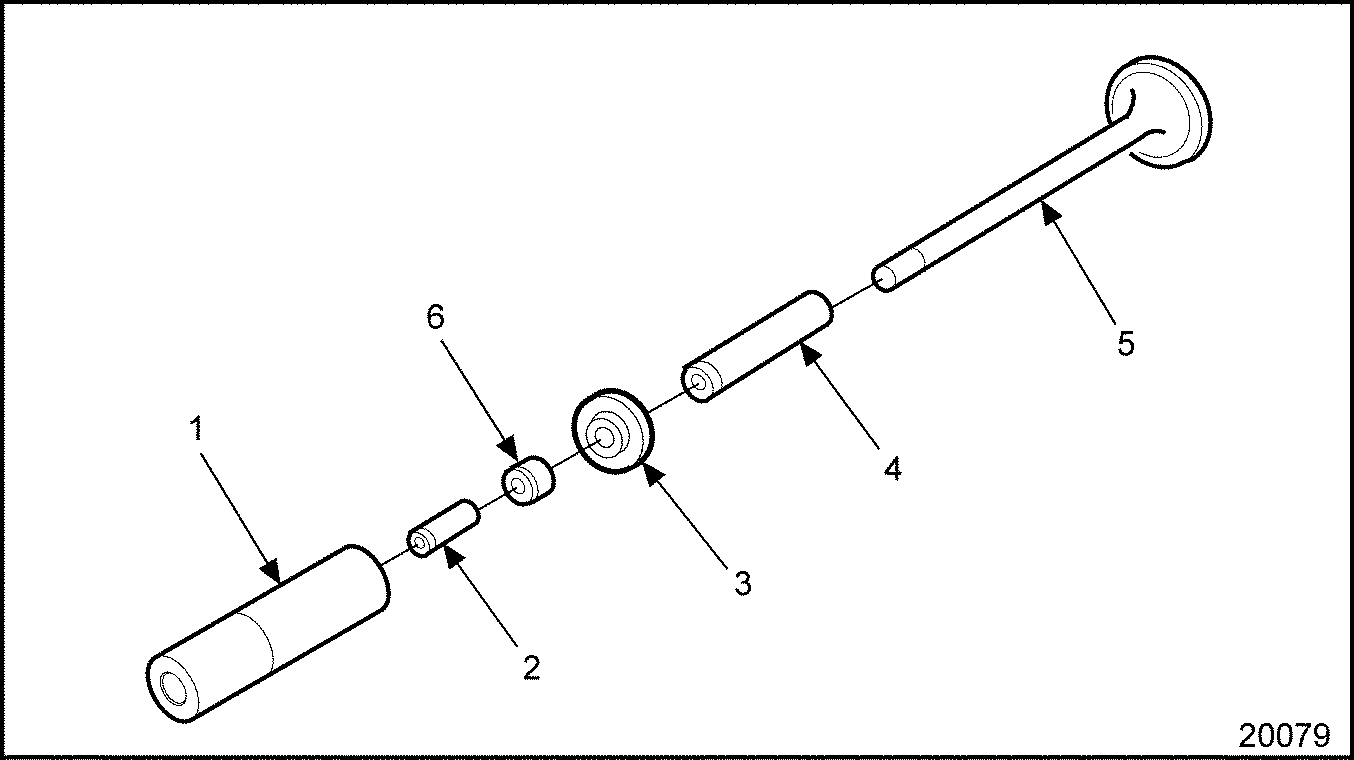
Valves are made of heat-treated alloys, with heads and stems precision ground. Stem ends are hardened to minimize wear in contact with the valve rocker buttons.
Hard-alloy valve seat inserts, pressed into both intake and exhaust ports, can be replaced when worn to restore new engine performance.
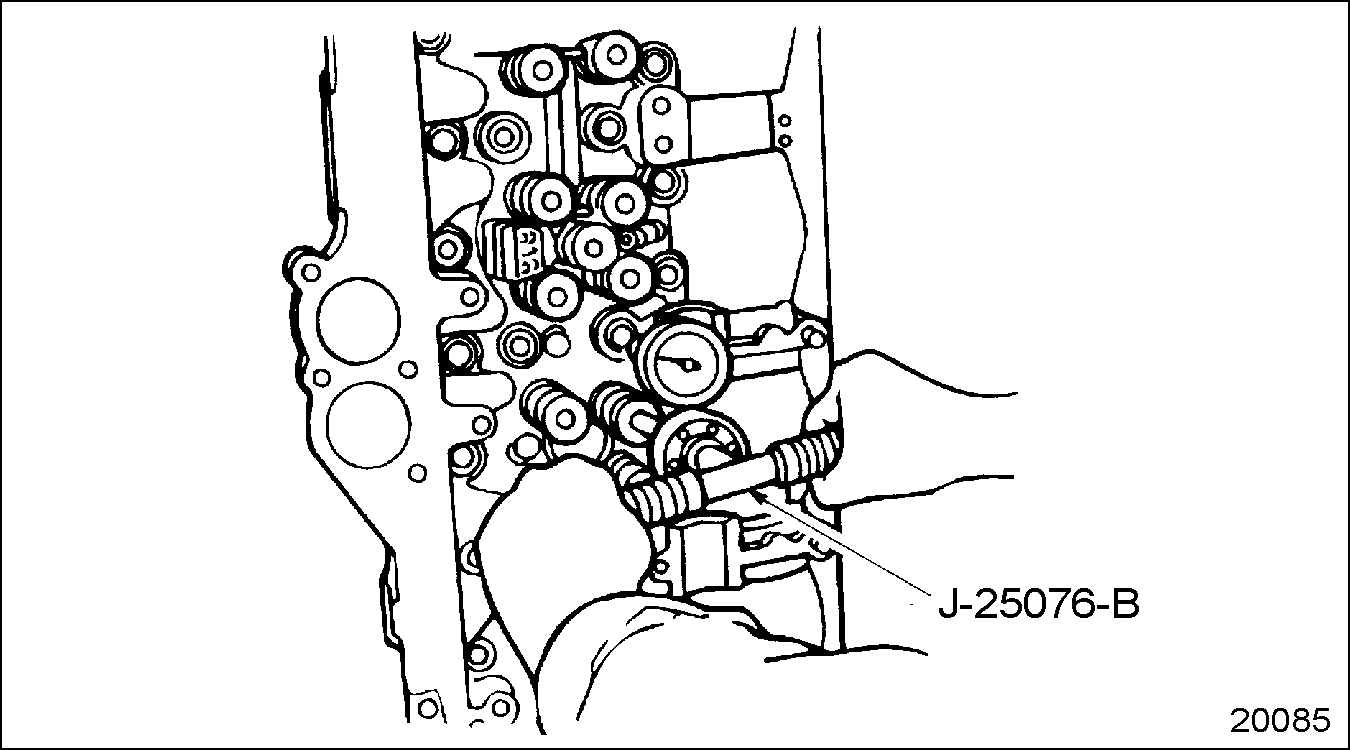
Replacement guides are reamed to close tolerances, and do not require reaming after installation.
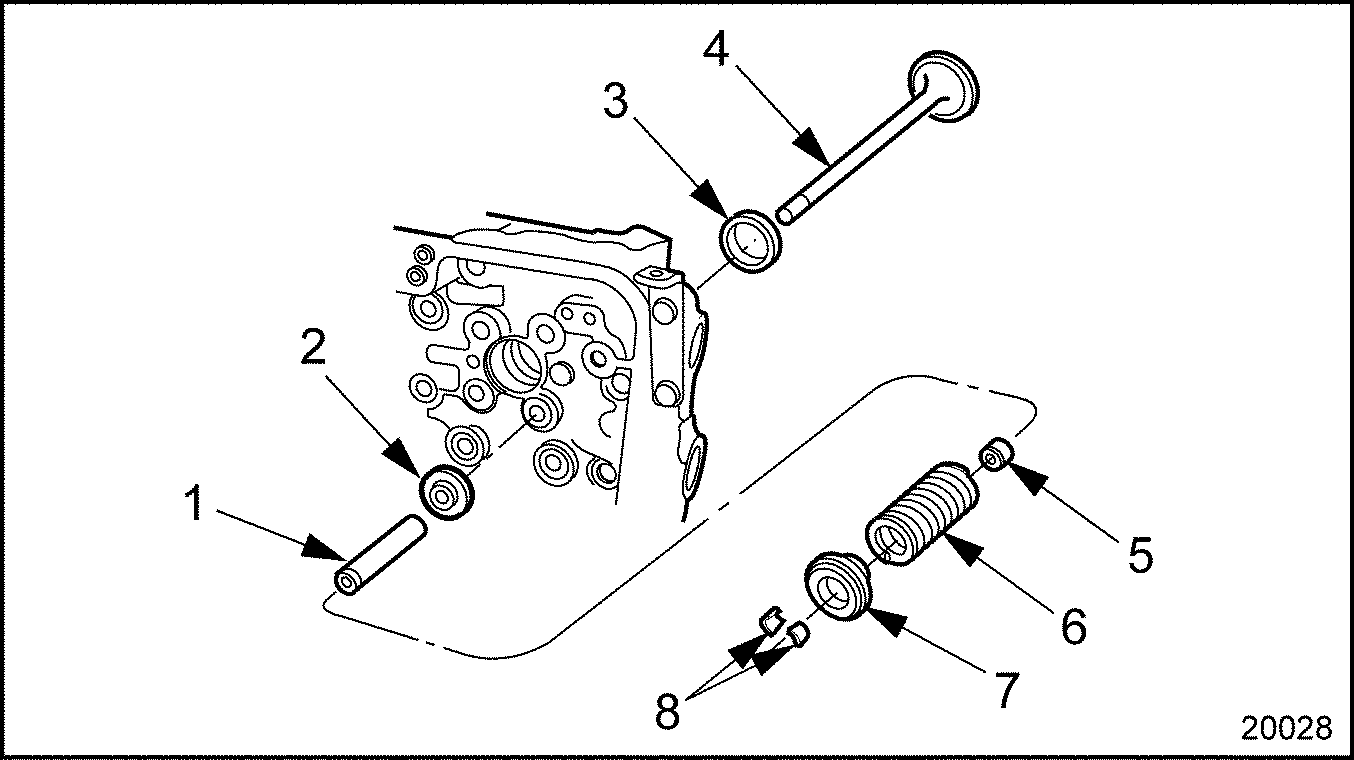
All valves are retained by valve rotator spring caps and two-piece tapered valve locks.
Valve stem oil seals, installed on both intake and exhaust valves, provide controlled valve stem lubrication while limiting oil consumption.
Note: New valve seat inserts are pre-ground and only need to be checked for concentricity after installation. Do not grind a new seat insert unless concentricity exceeds 0.05 mm (0.002 in.). Before grinding, be sure the valve guide is not excessively worn or bent, which could cause an erroneous concentricity reading. If the firedeck has been resurfaced, the valves will have to be seated deeper to restore the valve head recess depth to specification limits. Do not grind seat inserts for this purpose. Reduced thickness inserts are available that are 0.2540, 0.5080 and 0.7620 mm (0.010, 0.020 and 0.030 in.) shallower than standard. When a reduced thickness valve seat insert is used, a correspondingly thicker valve spring seat must be used. See Figure
"Standard Valve Seat Insert Thickness"
, and see Figure
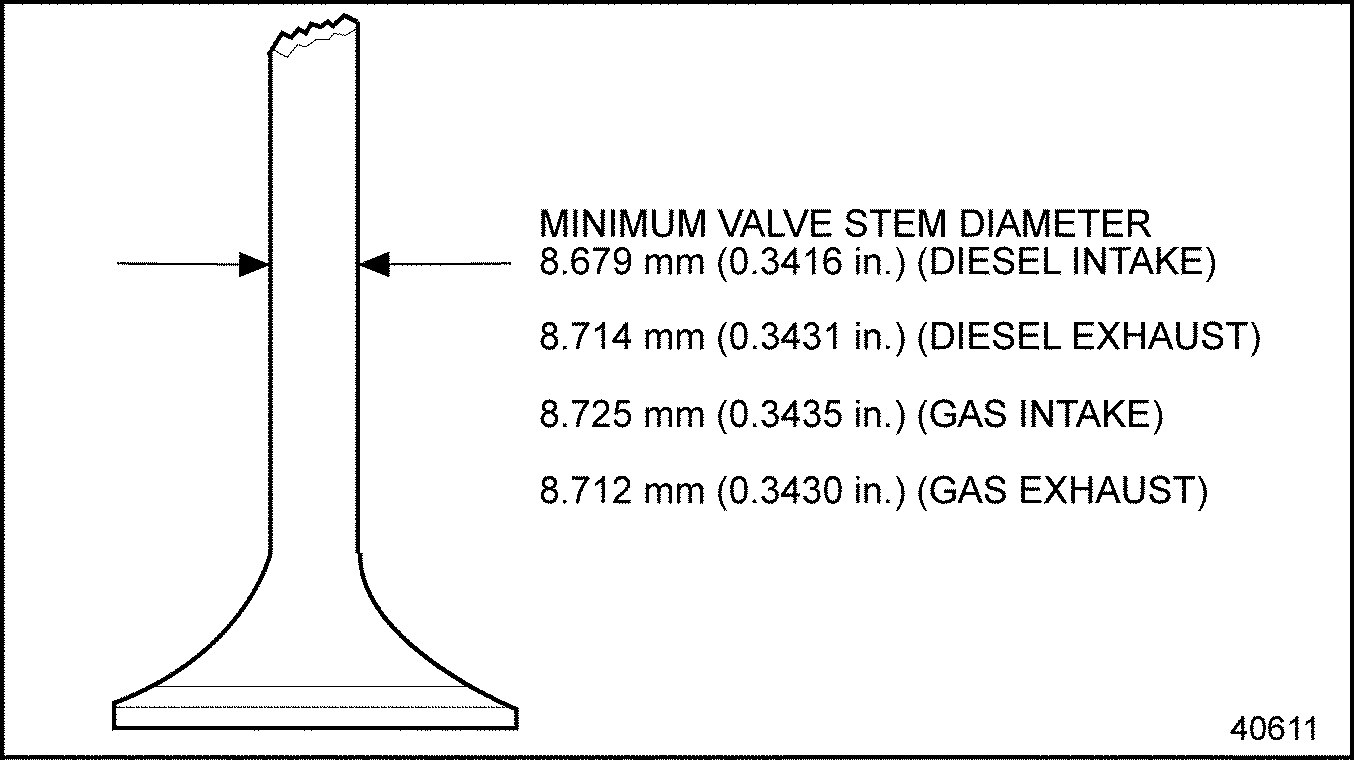
"Minimum Valve Stem Diameter"
.
Figure 3. Standard Valve Seat Insert Thickness
When servicing exhaust valves, determine which type of exhaust valve is contained in the engine. If an exhaust valve must be replaced, use the same type that was removed. Do not mix exhaust valve types within an engine. Both exhaust valves are available from service stock for this purpose. Exhaust valve lash settings are affected by the type of exhaust valve that is contained in the engine. The valve lash settings and injector timing height are listed on the valve rocker cover. Refer to "13.2 Valve Lash, Injector Height (Timing) and Jake Brake® Lash Adjustments"
.
Figure 4. Minimum Valve Stem Diameter
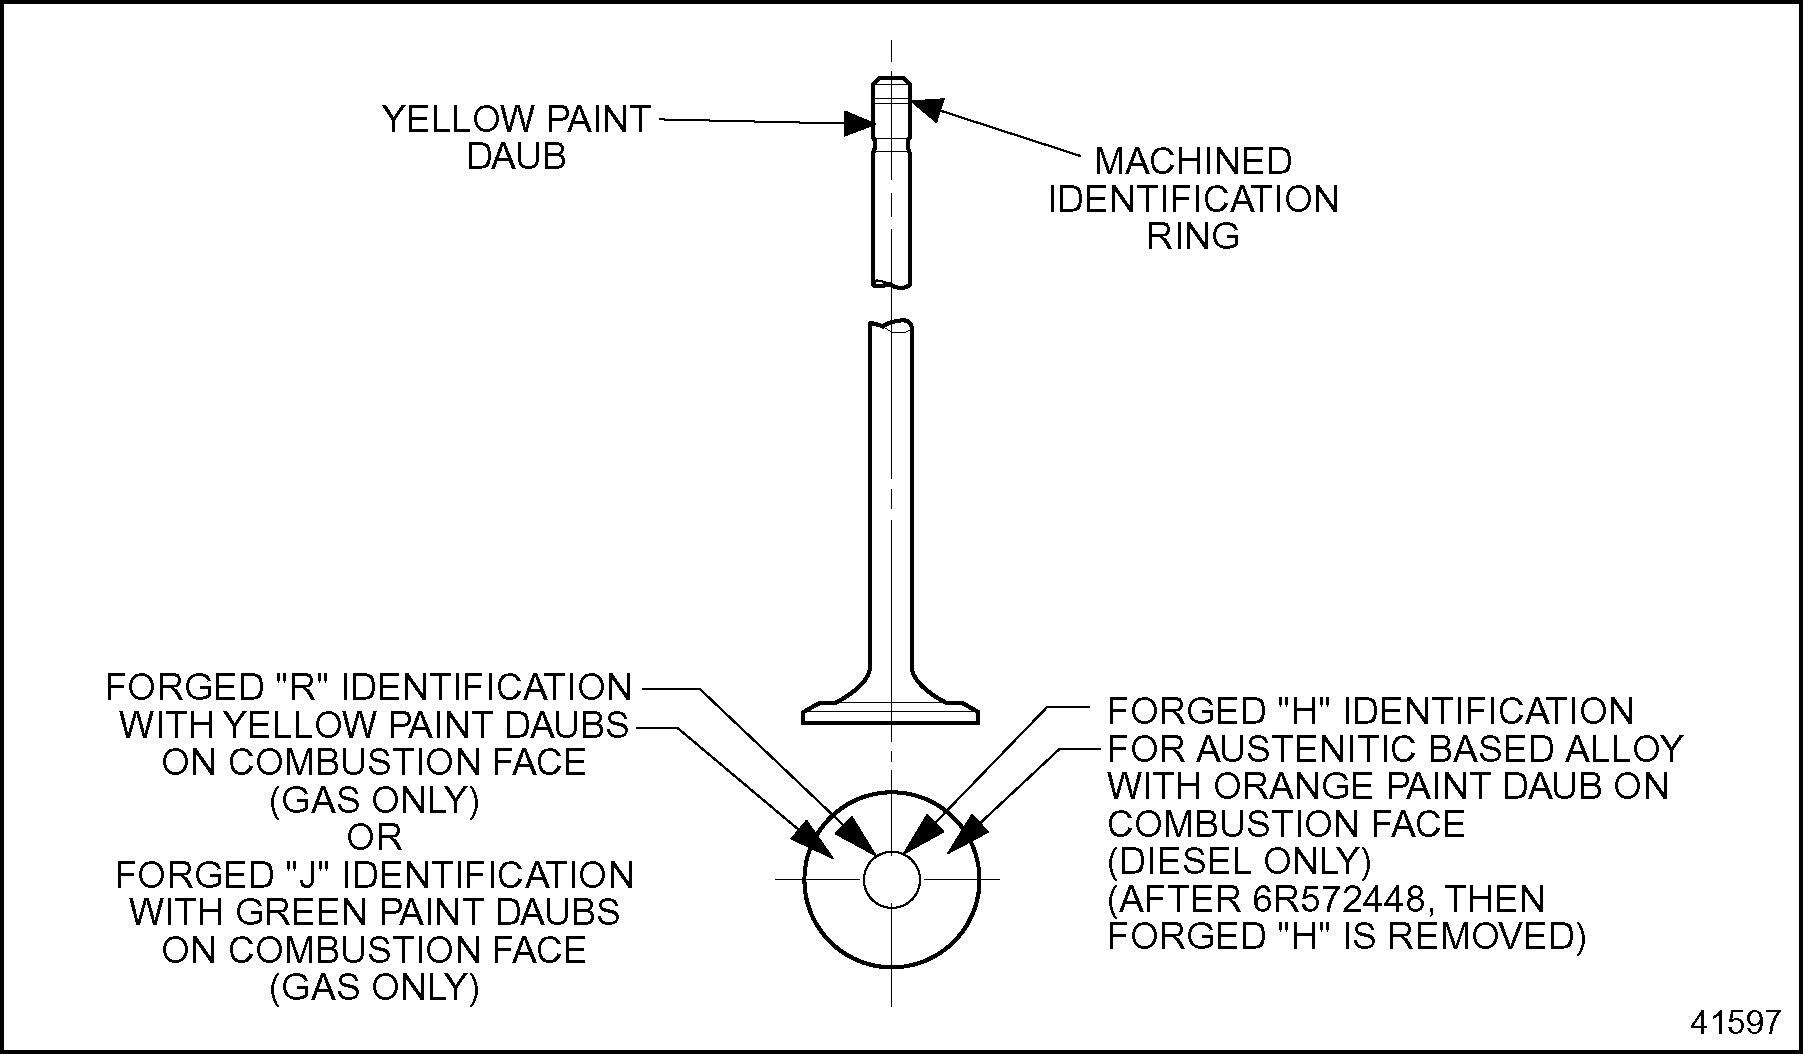
Two types of exhaust valves are used on Series 60 engines. Pre-1991 model engines use a nickel-based alloy which can be identified by a forged "U" on the combustion face. 1991 model and beyond engines use an austenitic based alloy which can be identified by a forged "H" on the combustion face, and by a machined identification ring above the valve lock groove. See Figure
"Exhaust Valve Identification"
. The identification ring can be seen from the right side of the engine with rocker cover removed.
Series 60G exhaust valves for automotive engines are an inconnel based material. They are marked with a "J" on the face of the valve and a "J6-E-5" and a green dot on the top of the stem of the valve.
Position the spring compressor cage portion of the valve spring compressor directly over the valve spring to be compressed. Engage the dowel of the cage in the closest slot of the valve spring compressor handle.
NOTICE:
Do not contact the valve with the compressor tool.
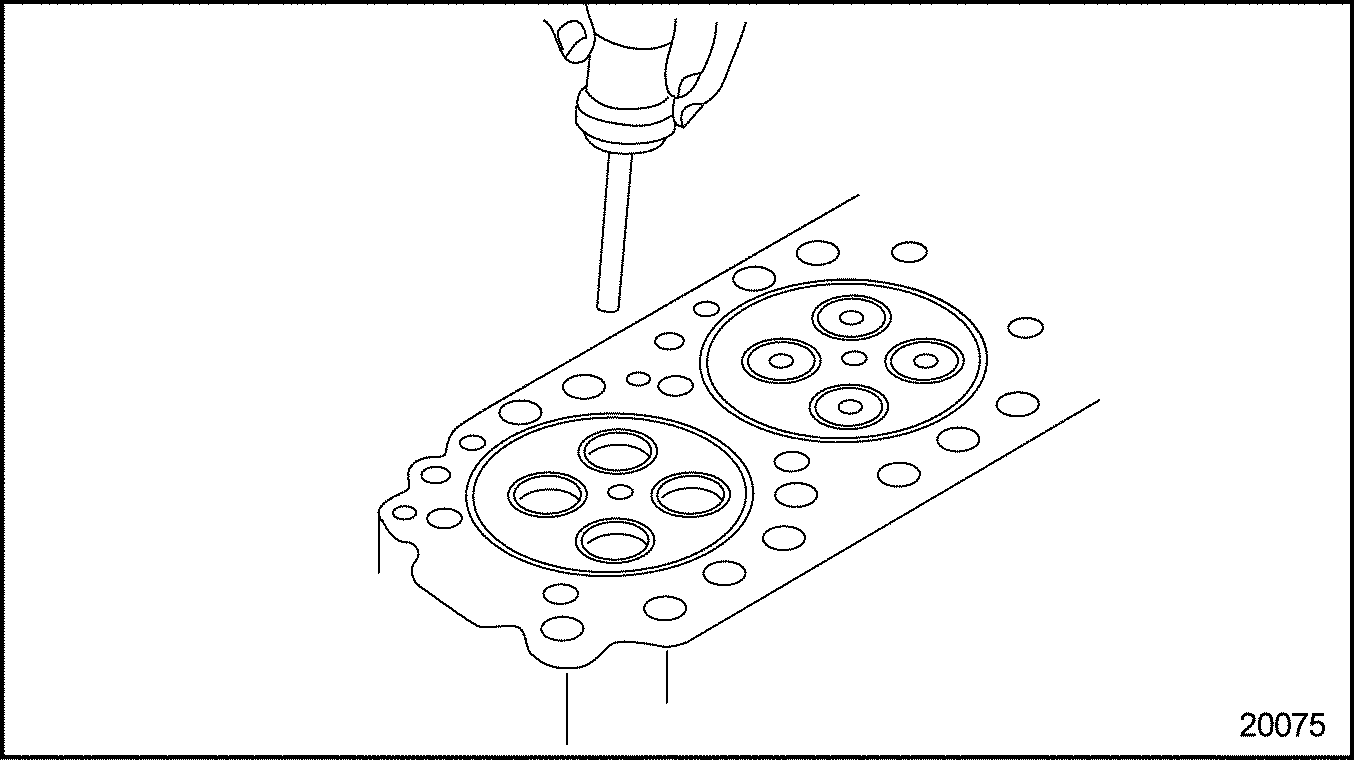
Compress the valve spring and remove the valve locks using a small magnet to prevent the locks from falling into the cylinder head oil return galleries.
Release the spring and remove the valve rotator and valve spring. If the valve stem oil seal is to be replaced, remove the seal and discard it.
On the other three valves it may be necessary to repeat these steps for cylinders being worked on. Refer to
step
and the following steps. Last, refer to
step
.
Note: All valve spring or seal removal and replacement must be completed for each cylinder being serviced while the piston is at top-dead-center, before turning the crankshaft to work on another cylinder.
Section 1.4.3 Removal and Cleaning of the Valve Spring (Cylinder Head Removed)
With the cylinder head assembly removed from the engine, remove the valve springs as follows:
Mount the cylinder head and adaptor plate to the overhaul stand adaptor by engaging the slots in the cylinder head adaptor plate to the dowels on the overhaul stand adaptor.
Install the six nut and bolt assemblies that secure the cylinder head adaptor plate to the overhaul stand adaptor.
Remove the cylinder head lifting hardware.
Turn the crank of the engine overhaul stand to position the cylinder head in an upright position.
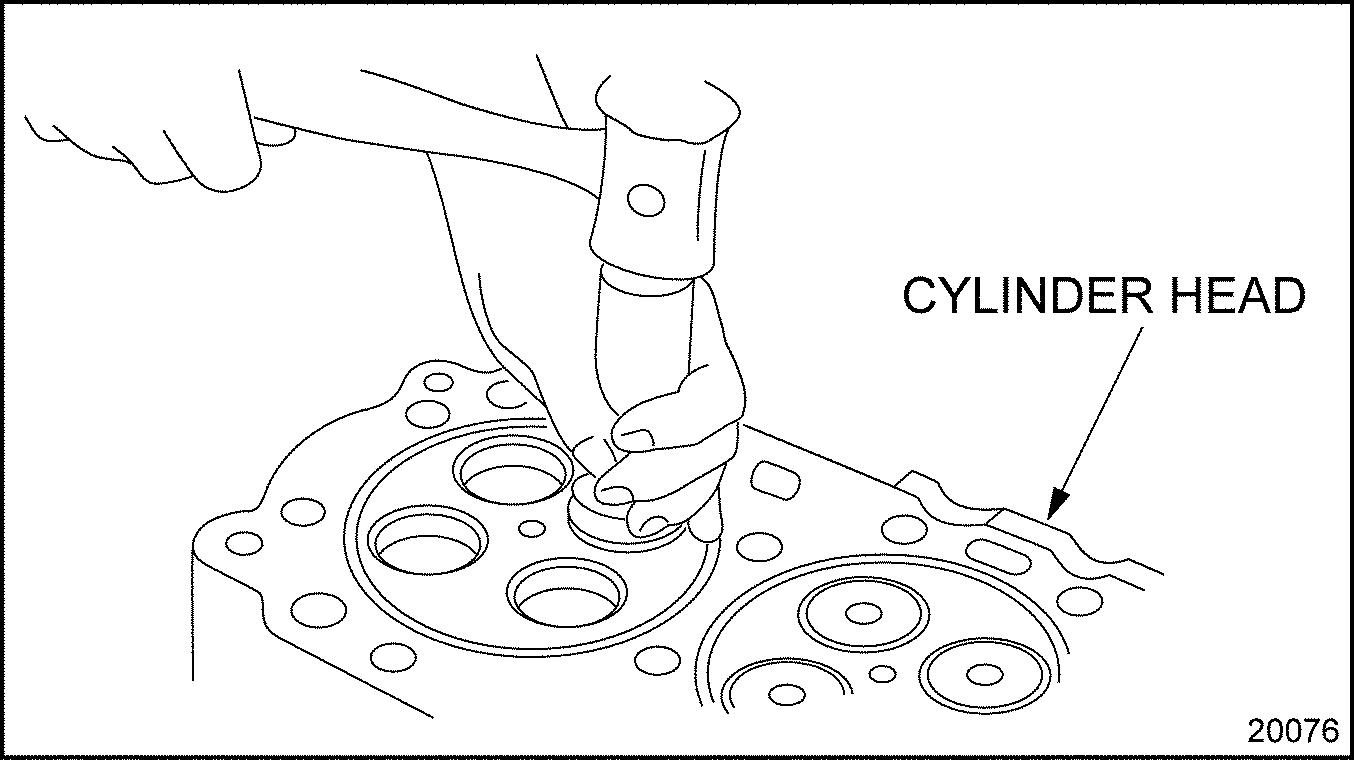
Release the spring and remove the valve, valve rotator and valve spring.
Remove the valve stem oil seal and discard the seal.
Remove the valve spring seat.
As parts are removed, mark or segregate them according to their original position for possible reuse.
Section 1.4.3.1 Cleaning of Valves and Related Parts
Clean the valves and parts as follows:
EYE INJURY
To avoid injury from flying debris when using compressed air, wear adequate eye protection (face shield or safety goggles) and do not exceed 276 kPa (40 psi) air pressure.
Using proper eye protection, clean all of the disassembled parts with fuel oil and dry with compressed air.
Clean the carbon from the valve stems and wash the valves with fuel oil.
Clean the valve guide bore to remove all gum and carbon deposits.
For diesel engines; use bore brush (J–5437)
(or equivalent) for this procedure.
For natural gas engines; a cloth or soft nylon brush is recommended for this procedure.
Note: Do not use bore brush (wire) on natural gas powdered metal guides.
Section 1.4.4 Removal of Valve Guide
Perform the following steps for valve guide removal:
Note: Valve guides are not replaceable on natural gas.
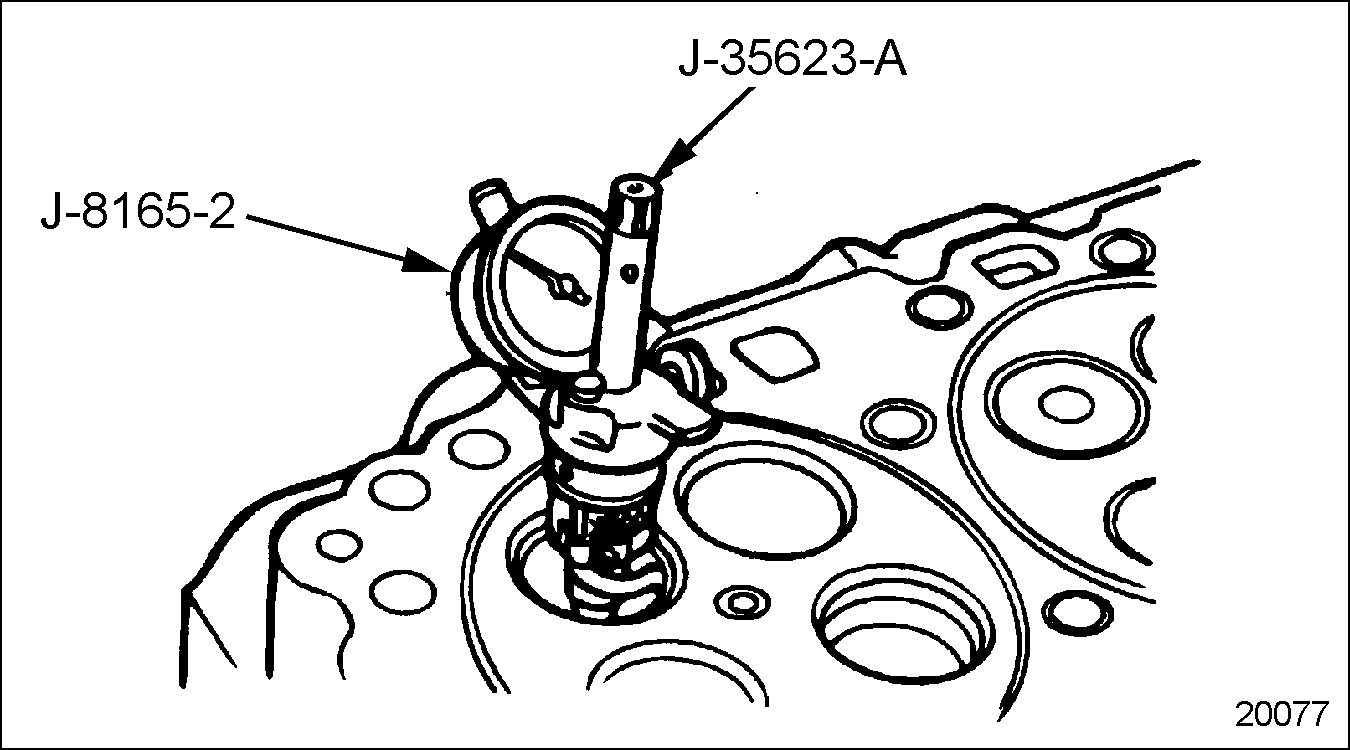
Using a new valve seat insert as a guide, turn the knurled knob on the end of the shaft to tighten and expand the collet until the valve seat insert will just slip off the collet. Refer to instructions supplied with the valve seat remover tool for correct tool operation.
Section 1.4.5.1 Inspection of Valve
The valve stems must be free from scratches or scuff marks, and, the valve faces must be free from ridges or cracks. Some pitting of the valve face is normal, and is acceptable as long as no leak paths are evident. If leak paths exist, reface the valves or install new valves. If the valve heads are warped or the valve stem is bent, replace the valves.
Figure 14. Intake and Exhaust Valve Face Refacing and Rim Width
Section 1.4.5.2 Inspection of Valve Springs
Inspect the valve springs and replace any that are pitted or cracked. The entire spring should be inspected. When a broken spring is replaced, the rotator and valve locks for that valve and spring should also be replaced.
If the spring load is less than 280 N (63 lb) at a compressed length of 67.25 mm (2.648 in.), the spring should be replaced and the valve locks should be discarded.
Section 1.4.5.3 Inspection of Valve Guides
Inspect the guides for cracks, chipping, scoring or excessive wear.
Measure the valve guide bore with a small hole gage or gage pin, and measure the valve stem diameter with a micrometer. Compare the measurements to determine valve stem clearance. If the clearance is greater than 0.152 mm (0.006 in.), the valve guide must be replaced.
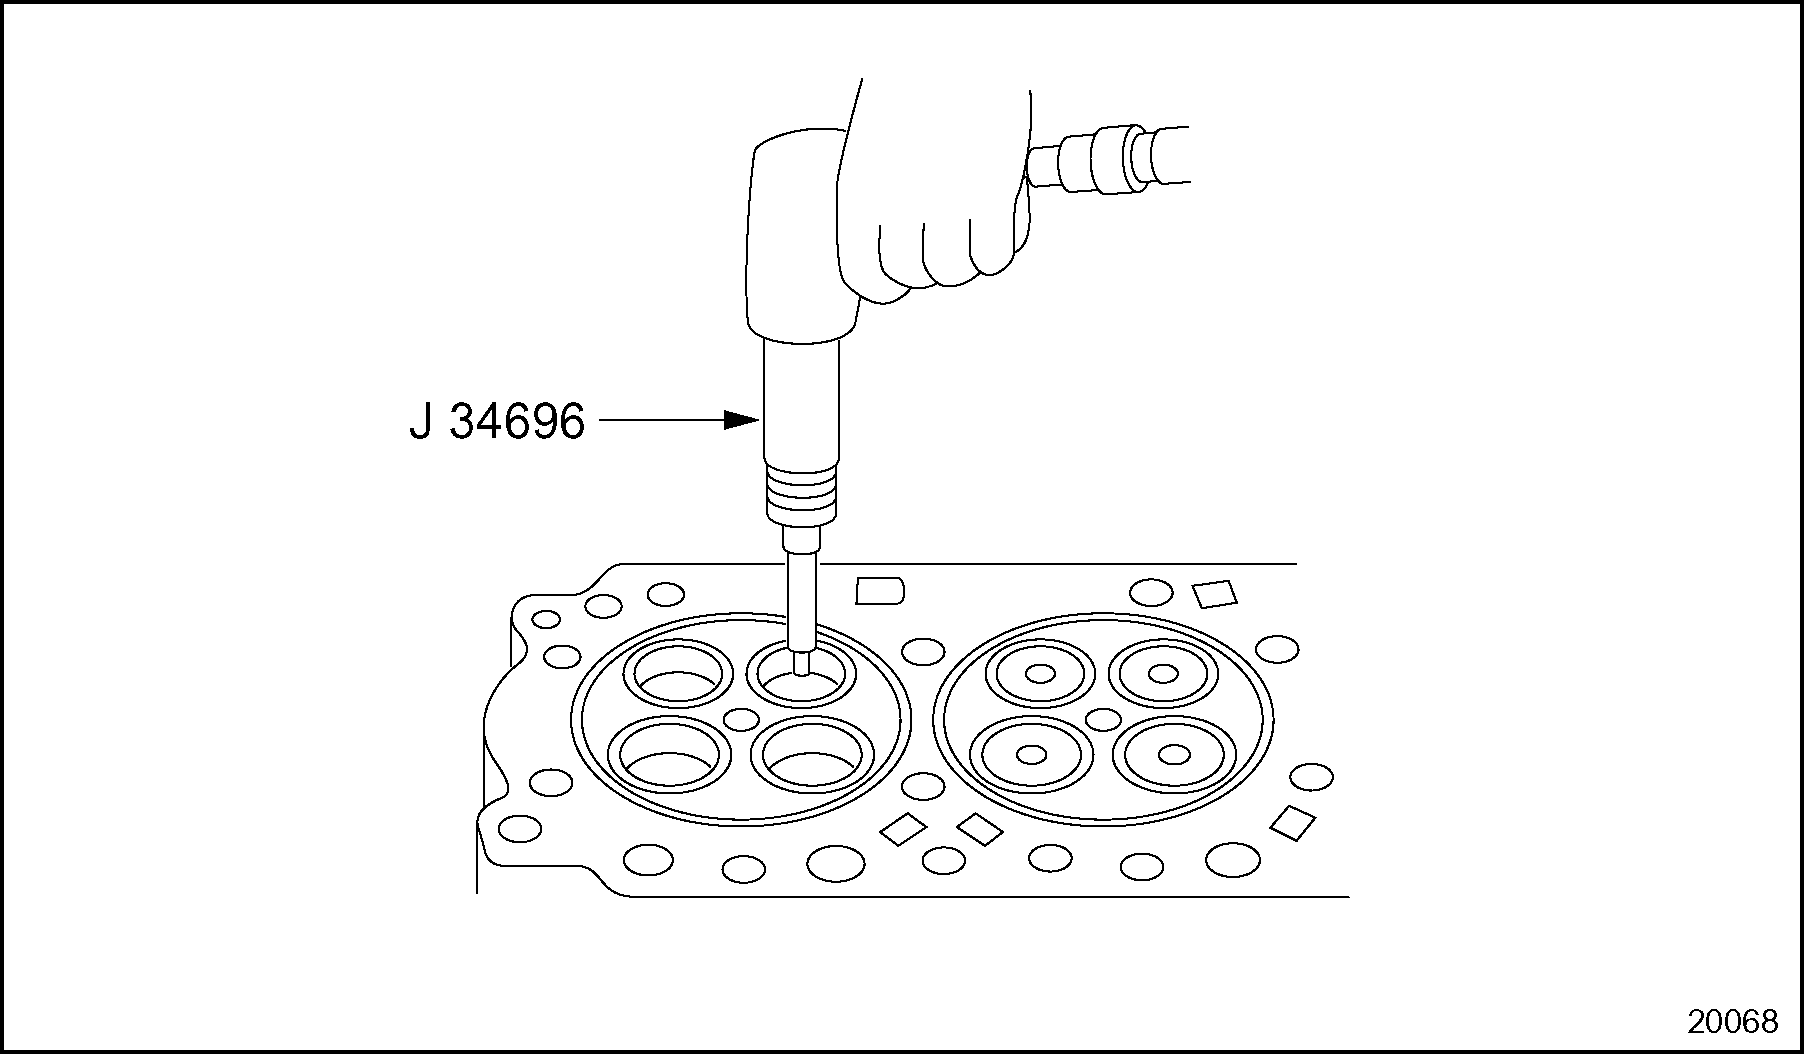
Section 1.4.6 Installation of Intake and Exhaust Valve Seat Insert
Perform the following steps for intake and exhaust valve seat insert installation:
EYE INJURY
To avoid injury from flying debris when using compressed air, wear adequate eye protection (face shield or safety goggles) and do not exceed 276 kPa (40 psi) air pressure.
Clean the seat insert counterbores and the new seat inserts with a suitable solvent and blow dry with compressed air.
If the concentricity is within 0.05 mm (0.002 in.), no grinding is required.
If the concentricity is not within 0.05 mm (0.002 in.), grind the seat only enough to true it up, being sure to lightly grind a full 360 degrees.
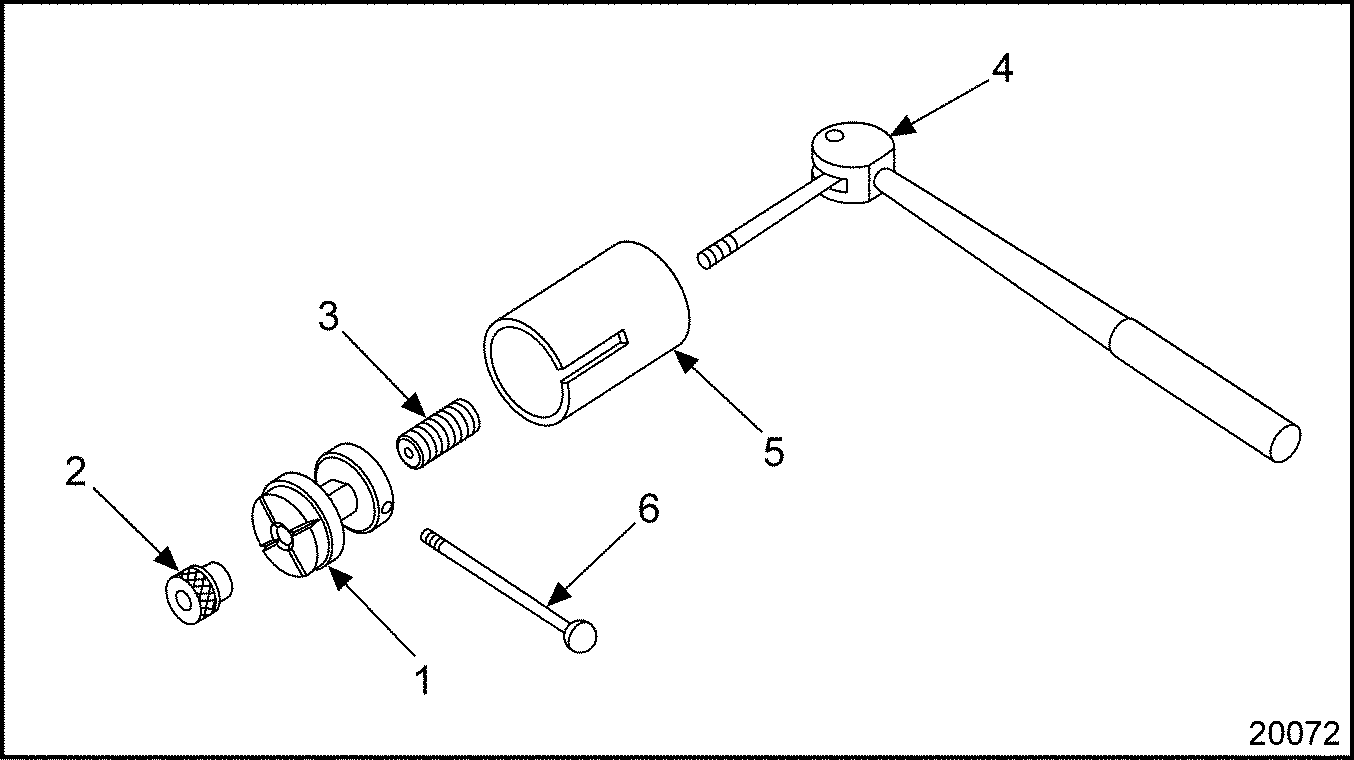
Note: Valve seat insert grinding should be limited to light clean-up or concentricity truing. For a fine, accurate finish, the eccentric grinding method using a valve seat insert grinding tool is recommended, because the grinding wheel contacts the insert at only one point at any time, and a micrometer feed permits controlled fine adjustment. See Figure
"Grinding Valve Seat Insert"
. Seats must be ground to a 31 degree angle.
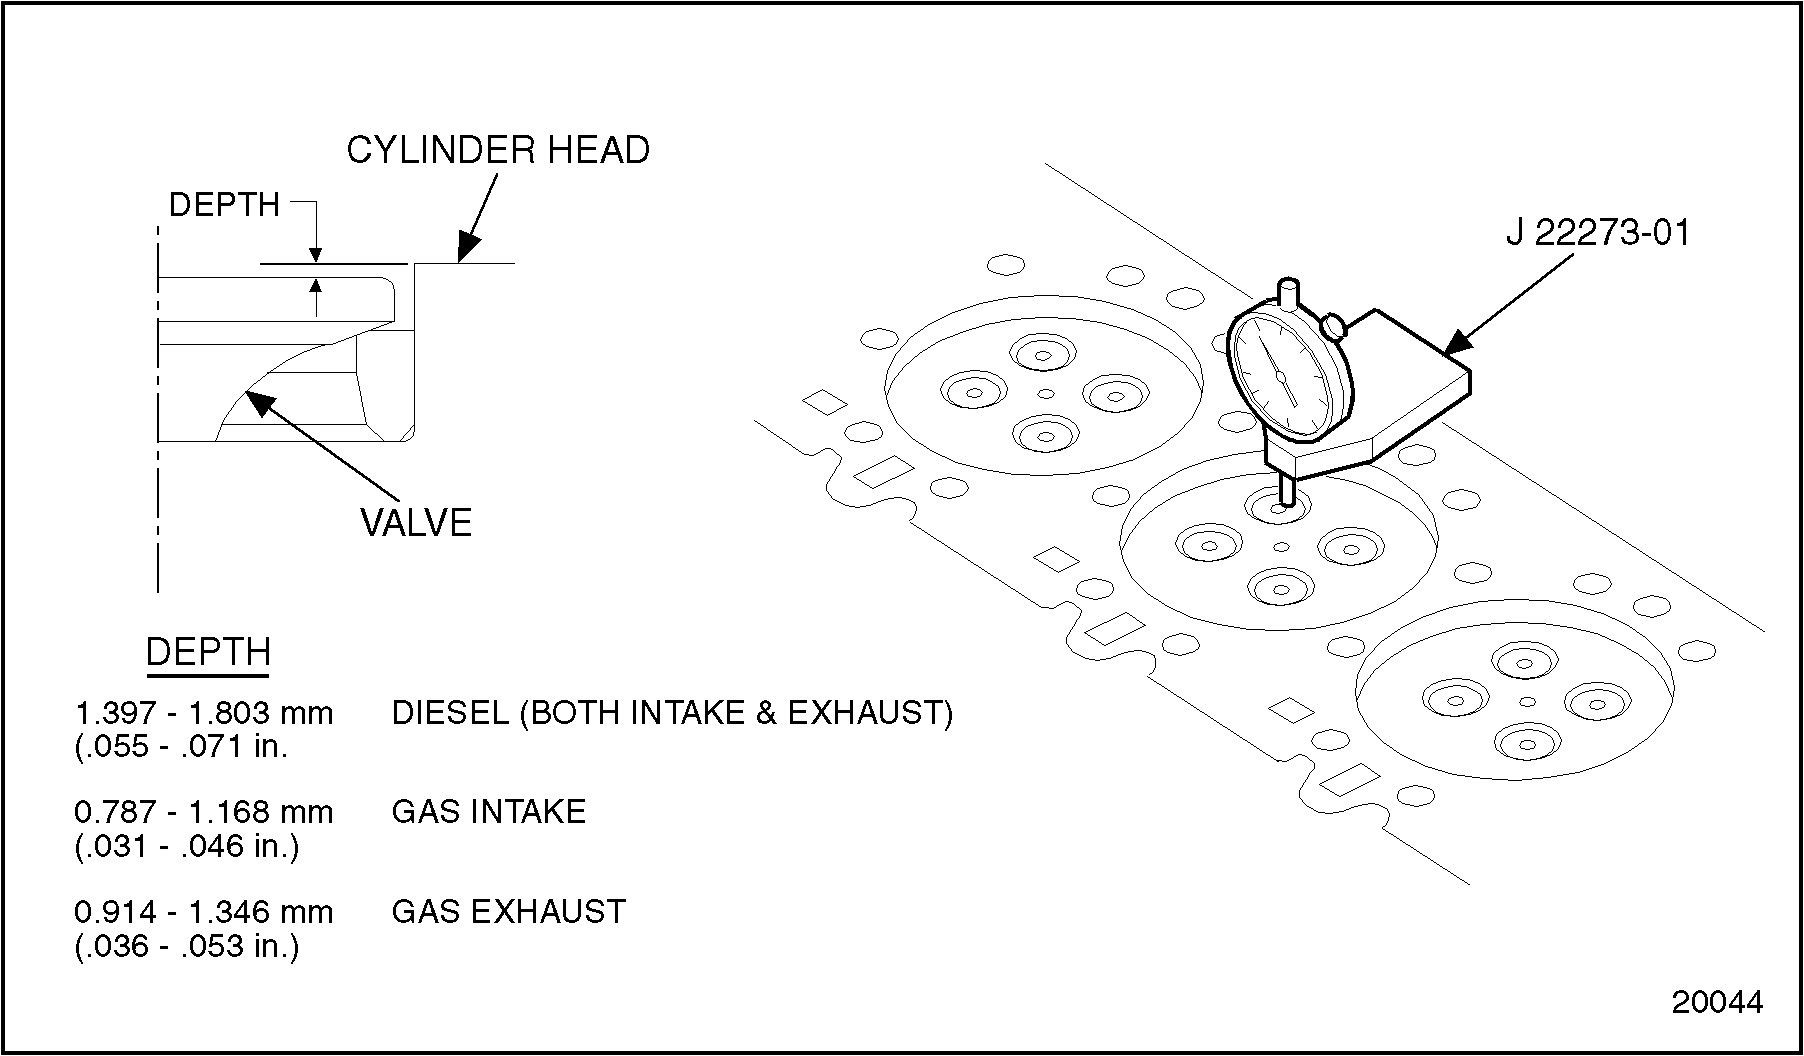
If the diesel intake exhaust valve head recess depth is not between 1.4 to 1.8 mm (0.055-0.071 in.), the valve and seat must be replaced.
If the gas intake valve head recess depth is between 0.79 to 1.17 mm (0.031-0.046 in.), the valve and seat are correctly installed.
If the gas exhaust valve head recess depth is not between 0.976-1.4 mm (0.030-0.053 in.), the intake 0.79-1.17 mm (0.031 -0.046 in.) valve and seat must be replaced for the Series 60G engine.
After light clean-up, thoroughly clean the valve seat with fuel oil and blow dry with compressed air. Check seat-to-valve face contact by applying a light coat of Prussian Blue (or equivalent) to the valve seat land. Insert the valve in the guide and "bounce" the valve head on the seat insert without rotating the valve. A full 360° contact line should appear approximately centered on the valve face.
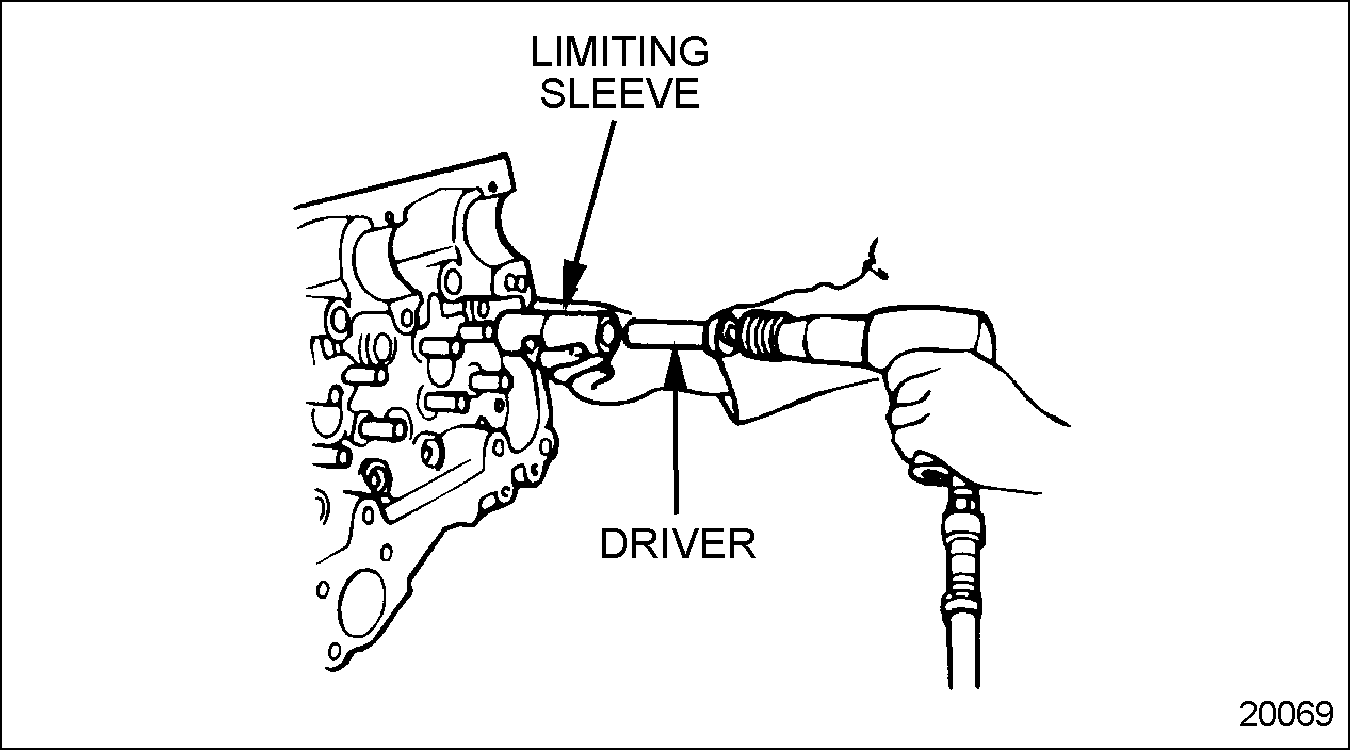
Section 1.4.7 Installation of Valve Guide
Perform the following steps for valve guide installation:
Note: Valve guides are not replaceable on natural gas.
Insert the driver into an air chisel. Insert the driver into the valve guide limiting sleeve (J–33191–A)
and install this assembly over the valve guide. Drive the guide into the cylinder head until the driver bottoms in the limiting sleeve. See Figure
"Valve Guide Installation"
.
Figure 24. Valve Guide Installation
Properly used, the installer ensures the correct protrusion of the valve guide from the cylinder head of 37.75 mm (1.486 in.).
Section 1.4.8 Installation of Valve, Spring, Seal and Rotator
Perform the following steps for valve installation:
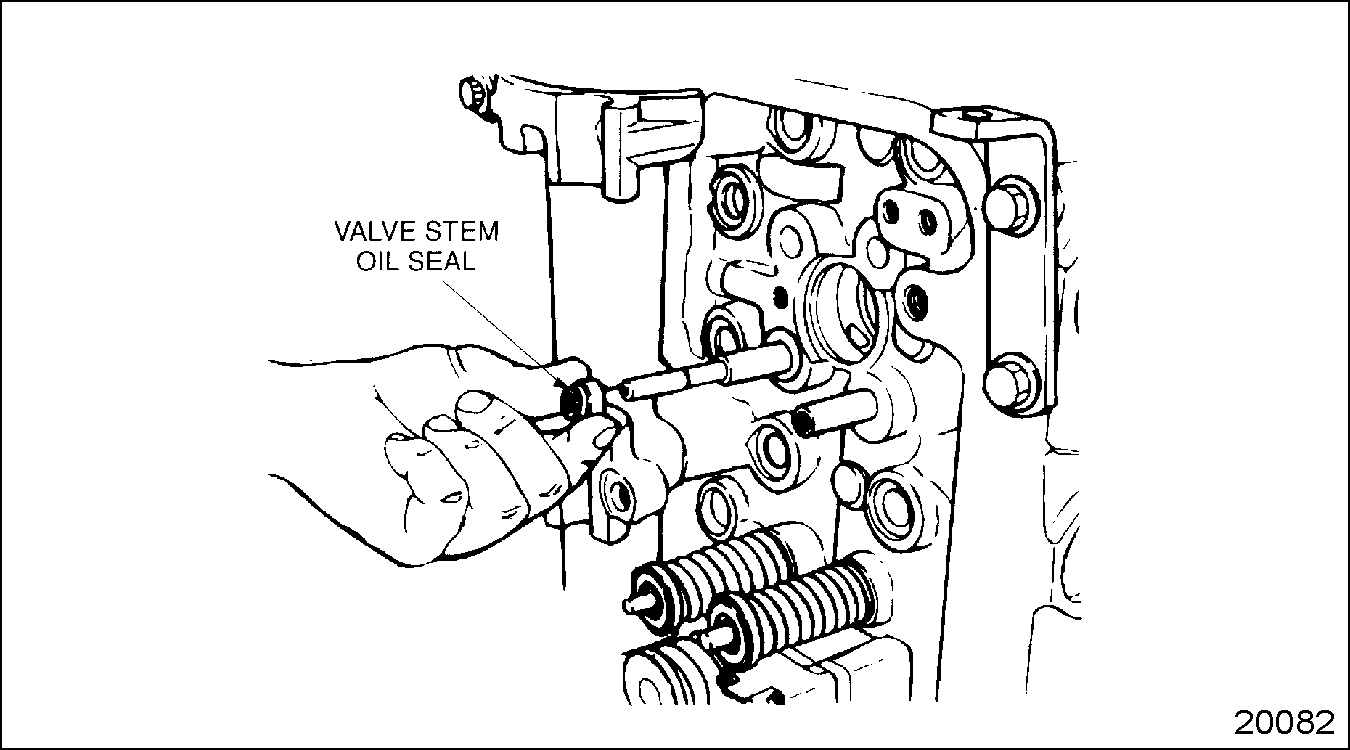
Position the cylinder head vertically on the overhaul stand. Lubricate the valve stems with clean engine lubricating oil and slide them into their respective valve guides and against the valve seats. If reusing valves, install them to their original positions.
Check the length of the plastic seal protector cap relative to the lock groove on the valve stem. If the seal protector cap extends more than 1.6 mm (1/16 in.) beyond the groove, trim off the excess length of the cap. See Figure
"Oil Seal Protection Cap Sizing"
.
Note: The valve stem oil seal on the natural gas engine has a larger inside diameter than the diesel engine. The seal portion of the natural gas oil seal is black in color.
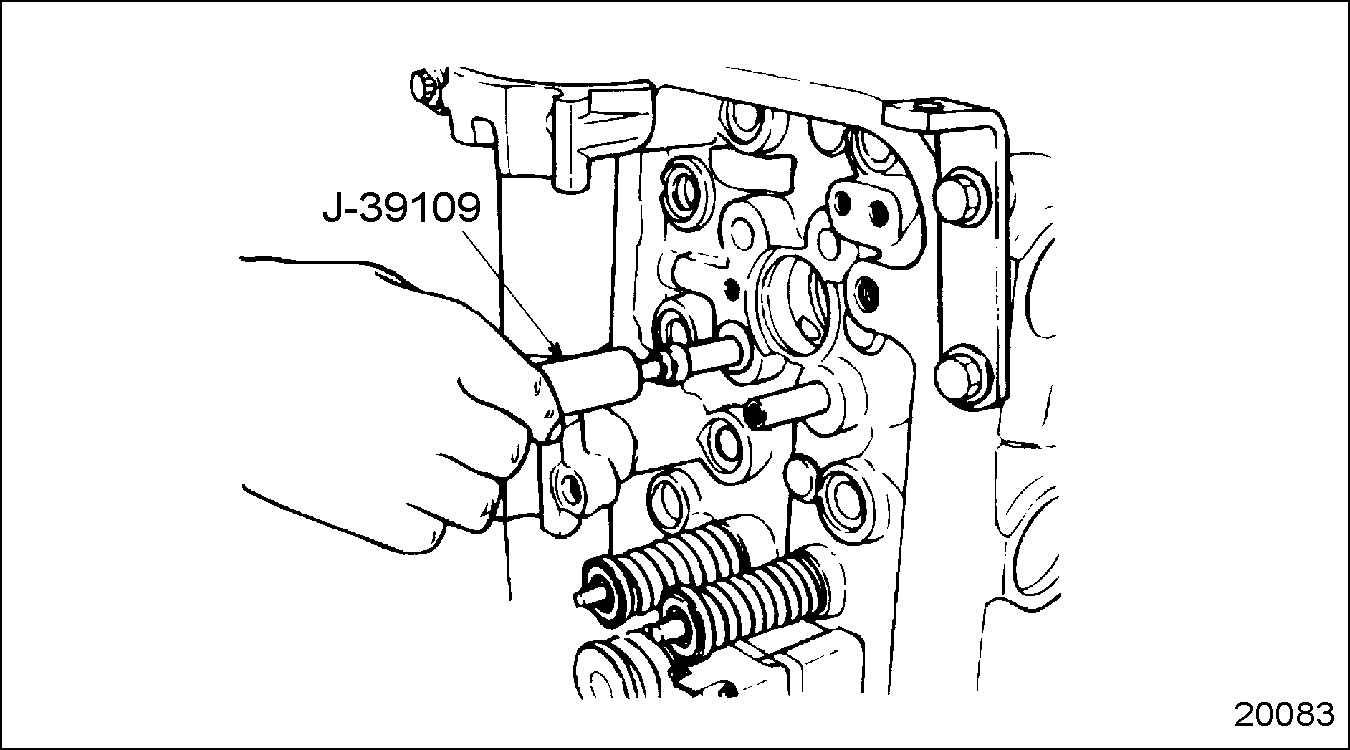
When the installer tool contacts the cylinder head, the seal is correctly positioned. Be sure the installer is square against the cylinder head. Remove the seal installer and protector cap.
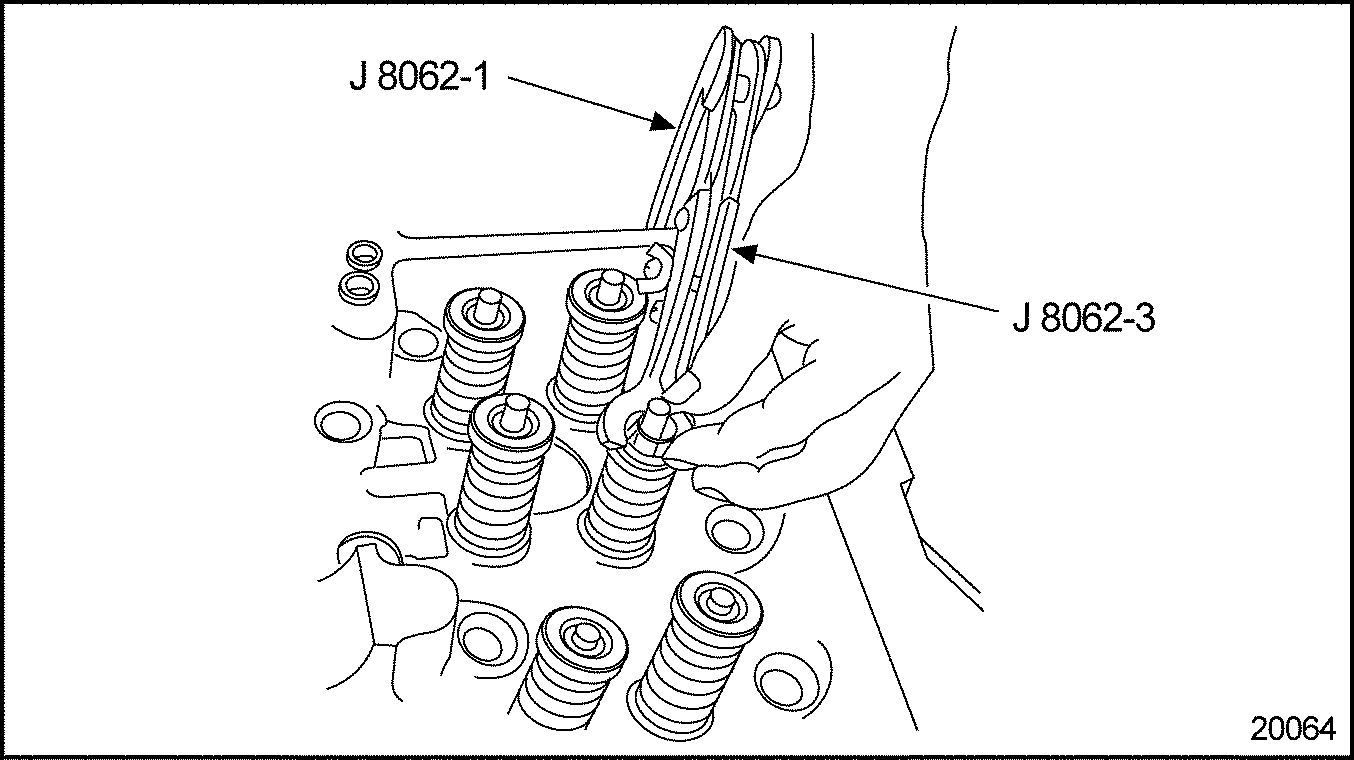
Using the valve spring compressor tool (J–8062)
, compress the valve spring only as much as required to install the valve locks. After installing the valve locks, rap the end of the valve stem sharply with a plastic mallet to seat the valve locks.
Note: Always install new valve stem locks when installing valves.
Note: Be sure the valve rotator is properly centered and aligned to avoid scoring the valve stem. Do not compress the spring any more than necessary to install the locks, to avoid damaging the oil seal.
Close any drain cocks that were opened and fill the cooling system. Refer to "14.6.4 Cooling System"
. Purge the air from the system using the vent in the thermostat housing. Complete filling of the cooling system is essential for proper engine operation.
PERSONAL INJURY
Diesel engine exhaust and some of its constituents are known to the State of California to cause cancer, birth defects, and other reproductive harm.
Always start and operate an engine in a well ventilated area.
If operating an engine in an enclosed area, vent the exhaust to the outside.
Do not modify or tamper with the exhaust system or emission control system.